


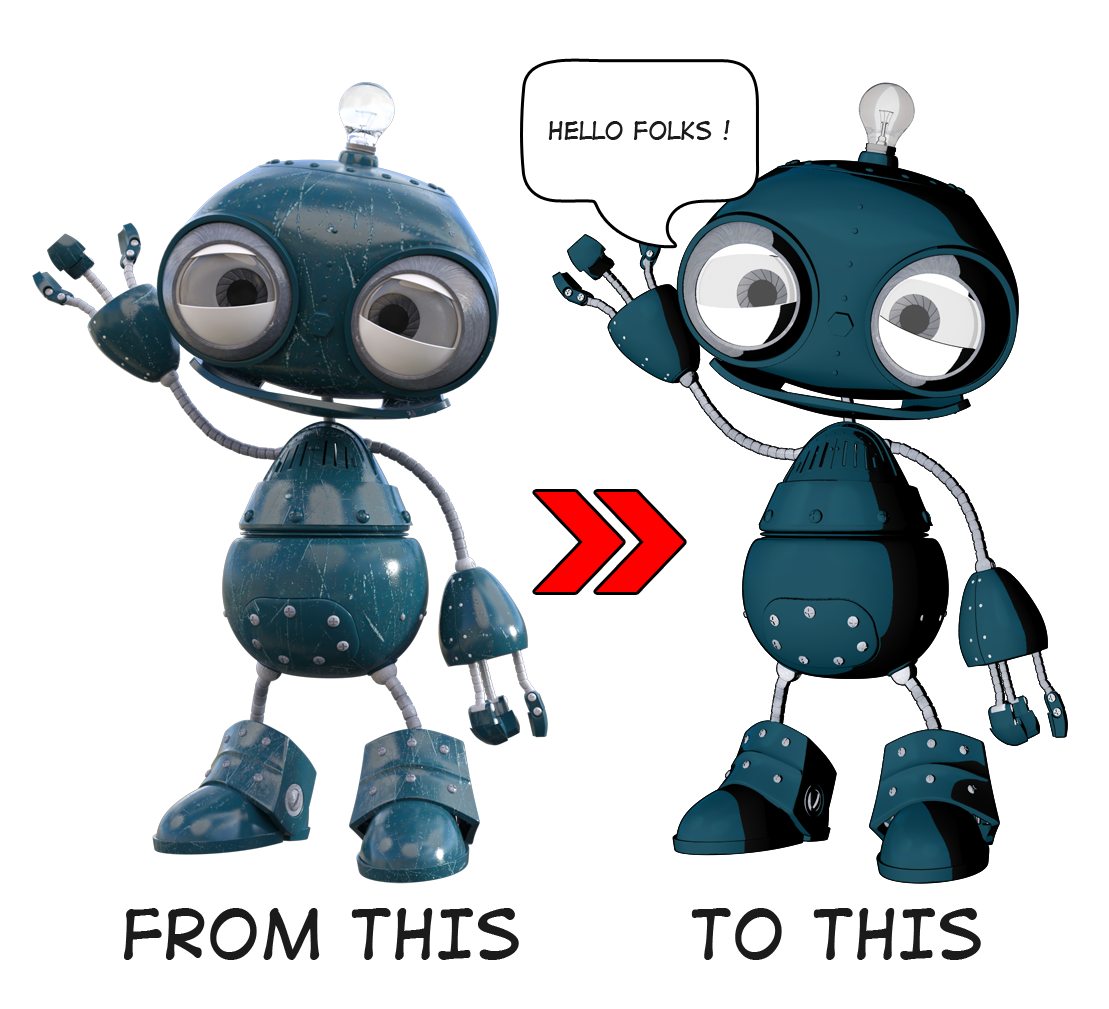
Hi folks ! Today I will try to illustrate a small tutorial on how to convert a 3D image rendered with the Scrappy 3D model into a toon anime style image.
You can find the Part 2 of tutorial here
First we simply render the 3D model of Scrappy with the Daz3d software from Daz3d.com. It will be sufficient to create a rendering with the default settings of the Daz3d software with some simple precautions. I will explain to you step by step what I did.
All we would need in this tutorial is:
- Daz3D software from Daz3D.com
- PWTOON PLUGINS (from Daz3D.com) installed in your Daz3D software
- Scrappy or any other similar model (you can find it on my store on Renderosity.com store)
- Filters from V4 Momoko product ( you can find it on my store on Renderosity.com store)
- Photoshop from Adobe Photoshop
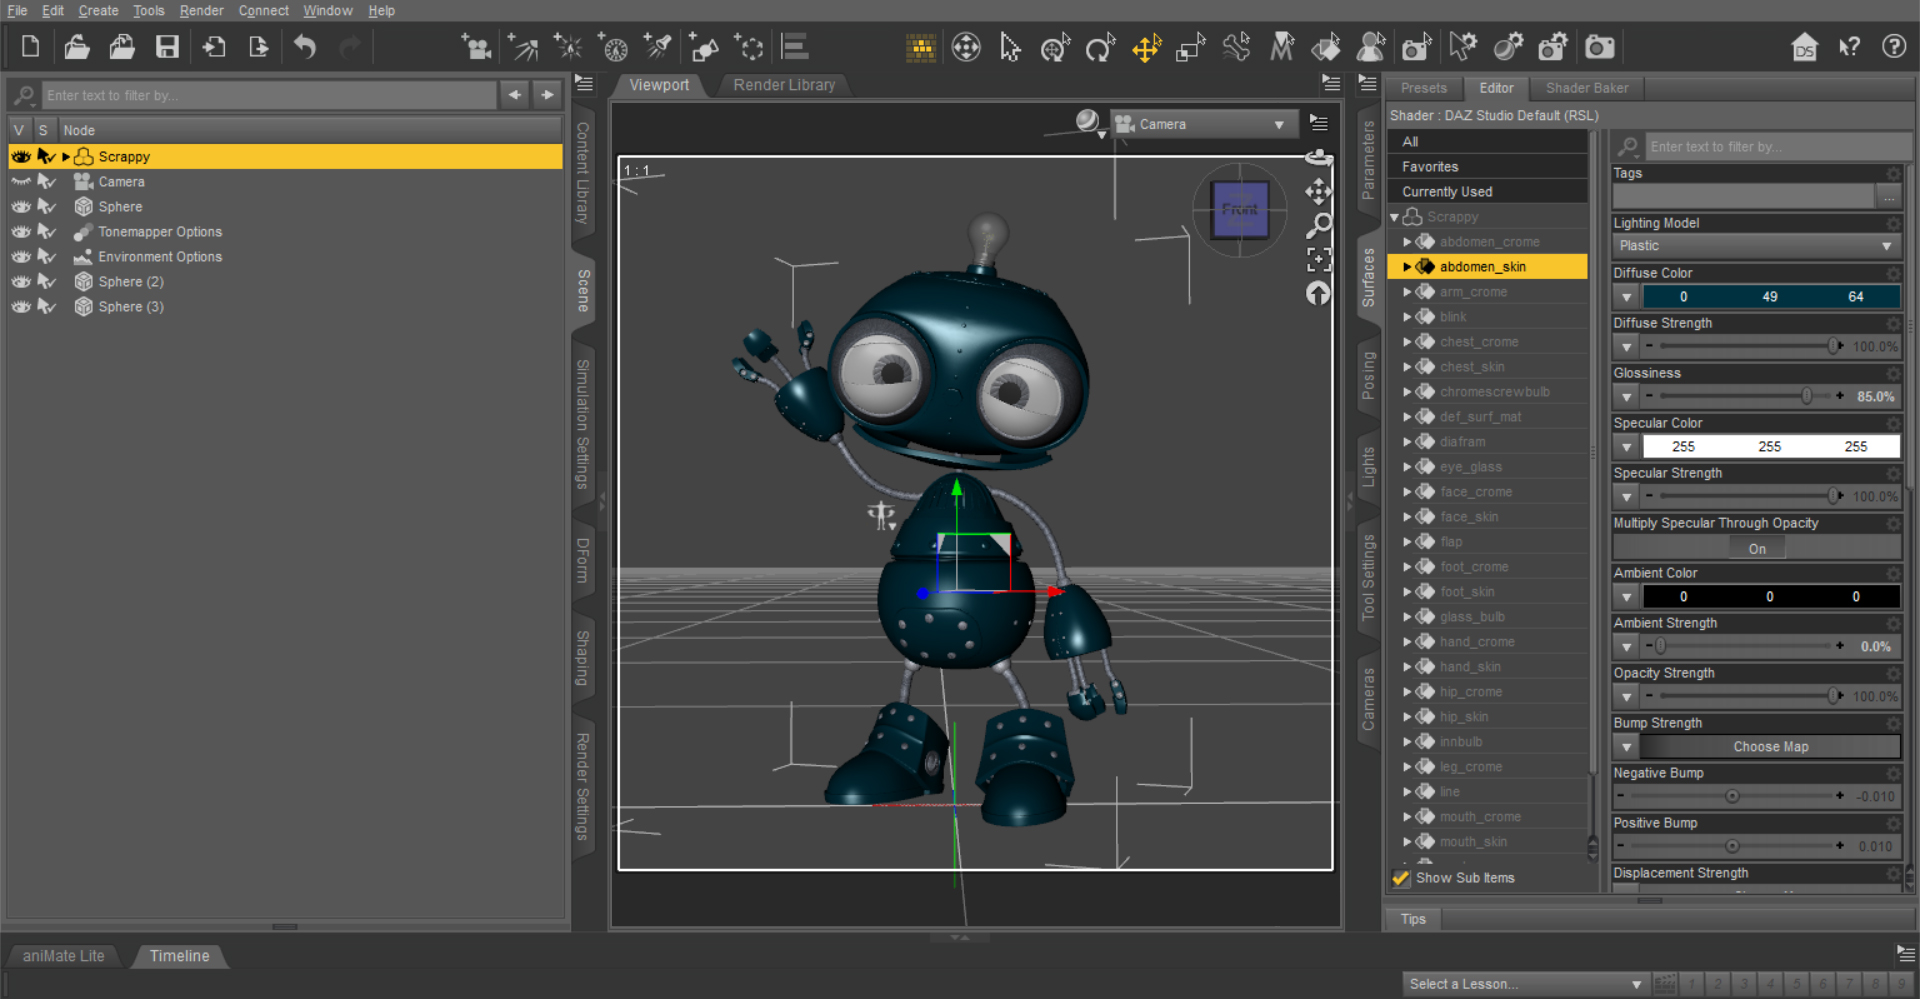
1 Step: Load Scrappy model from your DAZ library.
It will be loaded with the IRAY material option. This is fine, but we need to change something.
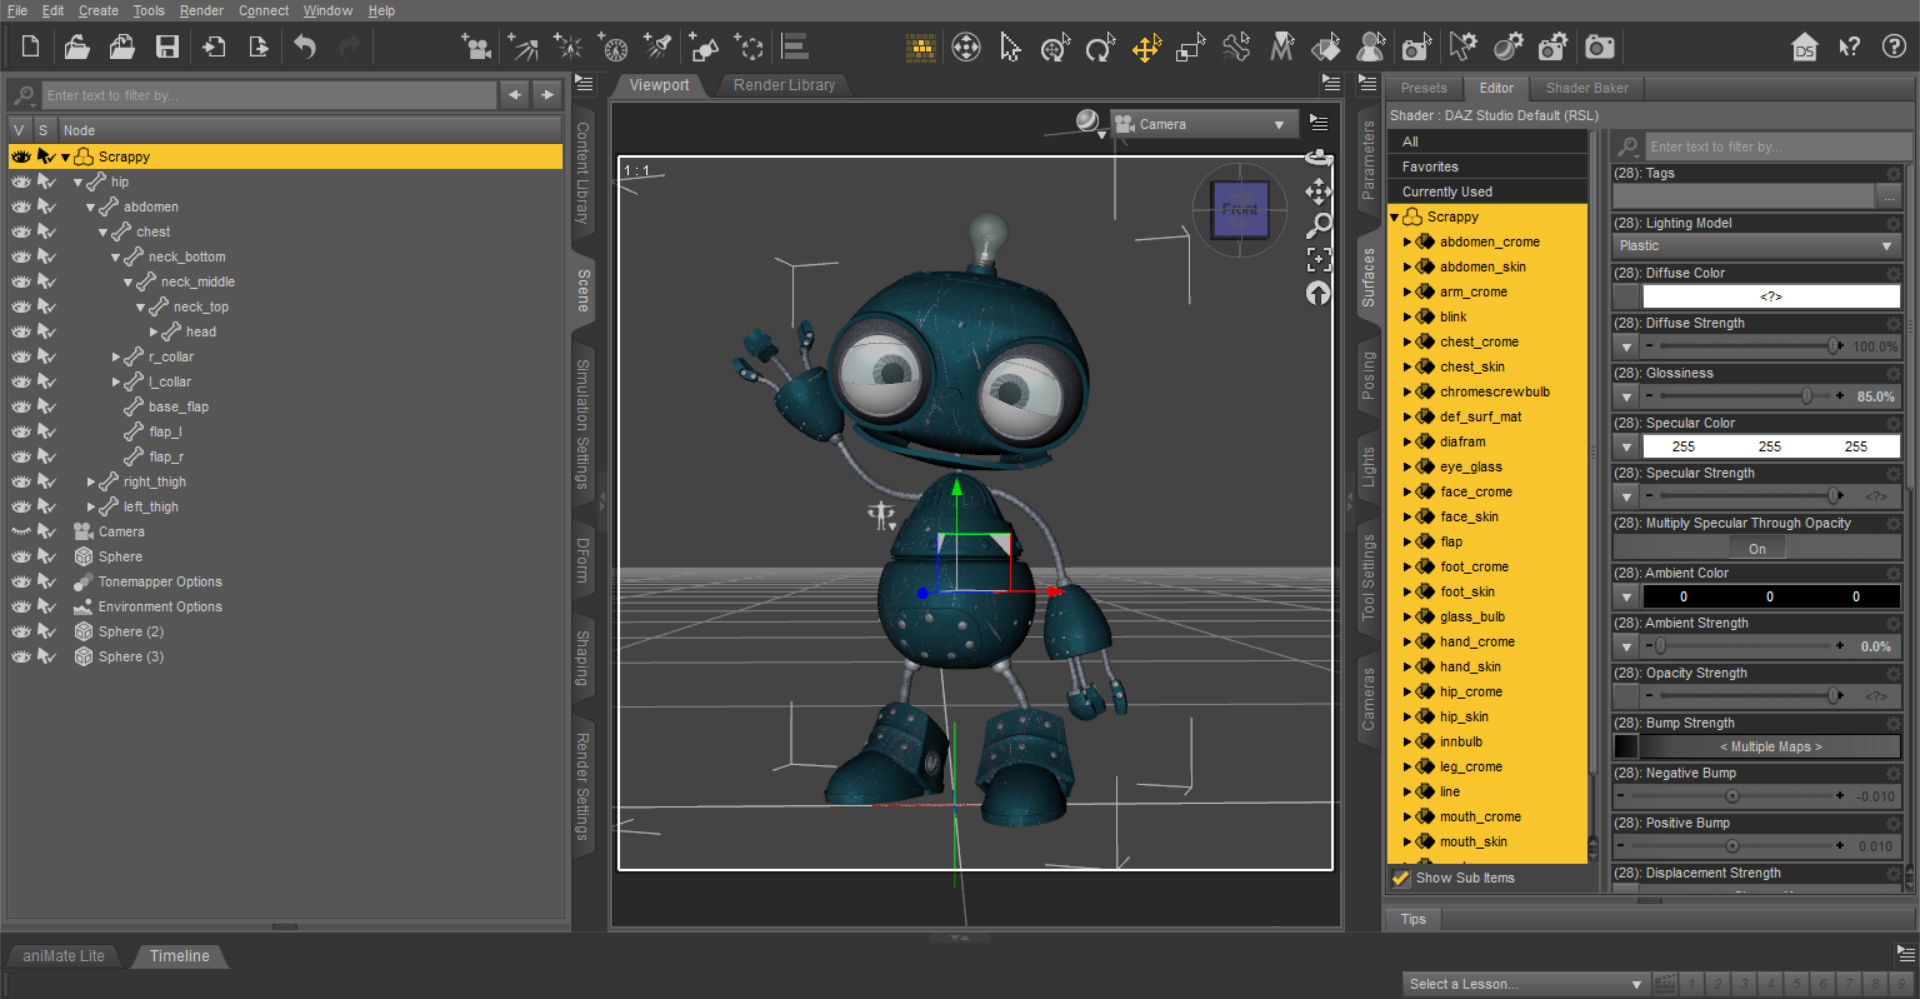
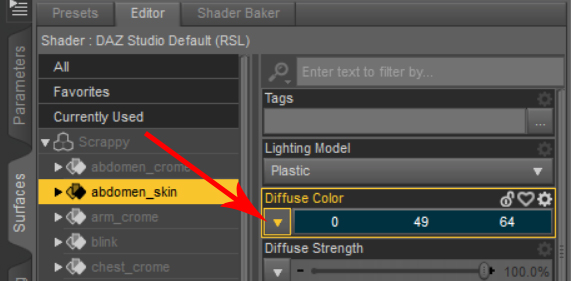
As you can see from the image below, in the "Surfaces" section I eliminated the main Texture ("Diffuse Color" section) and set the color from the color palette ( 0 49 64 ). I did this for:
abdomen_crome
abdomen_skin
chest_crome
chest_skin
face_crome
face_skin
flaps
foot_skin
hand_skin
hip_skin
mouth_crome
mouth_skin
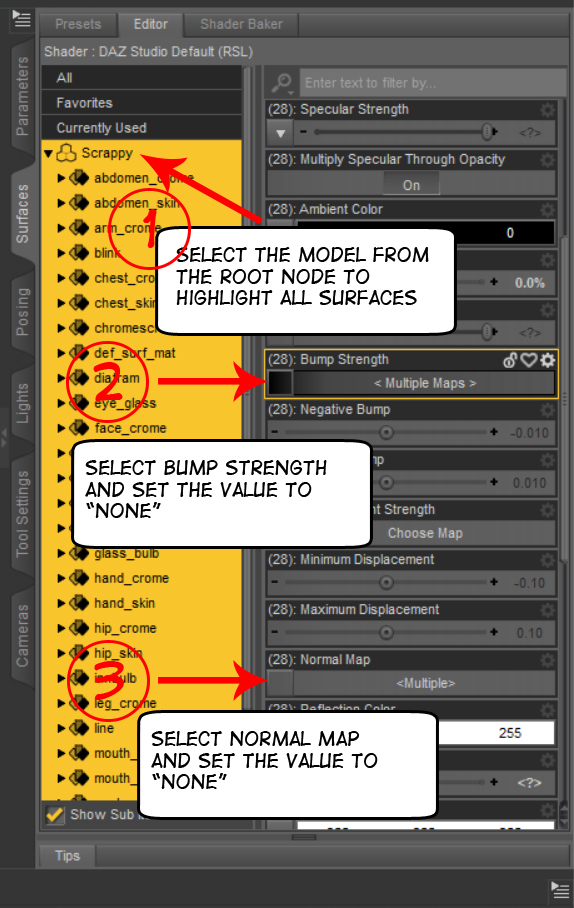
After this operation I selected all the surfaces and deleted the "Bump Strength" maps and the "Normal Maps" leaving them set to the value "None"
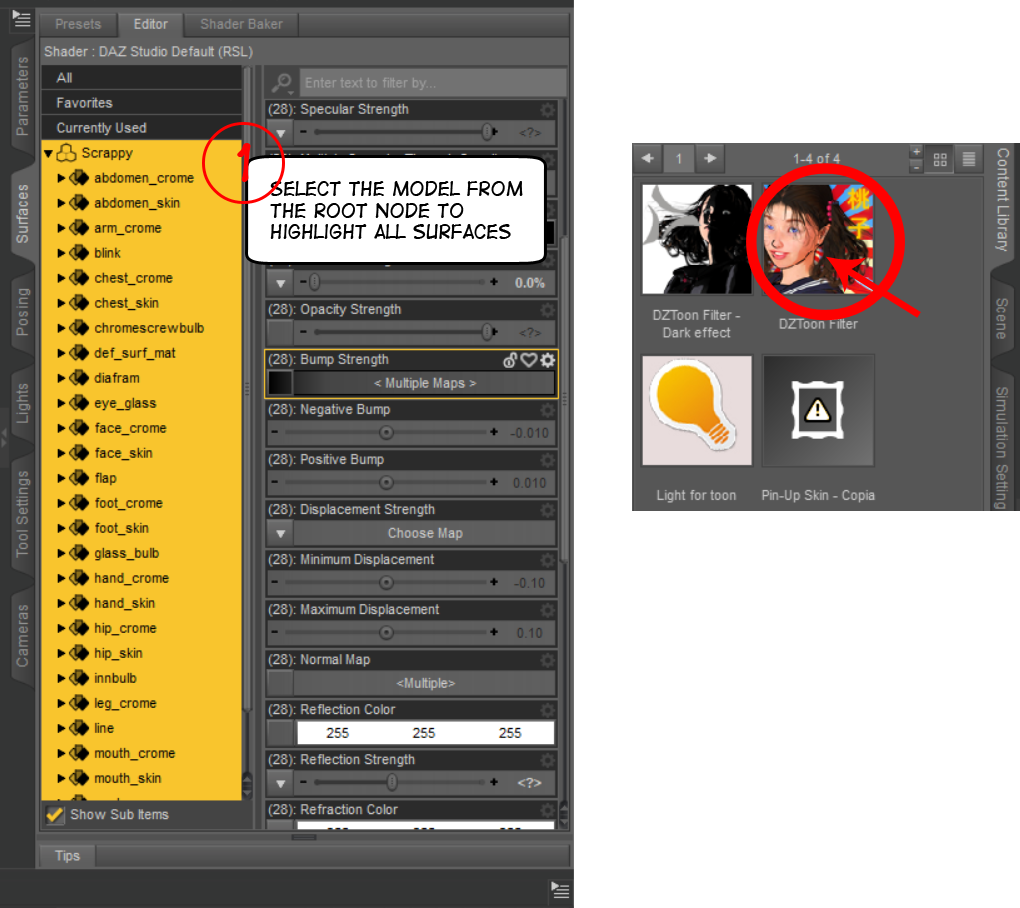
Now leave all the surfaces selected and go to the "V4_Momoko_Filter" folder. Double click on "DZToon Filter" and double click on "Light for toon"
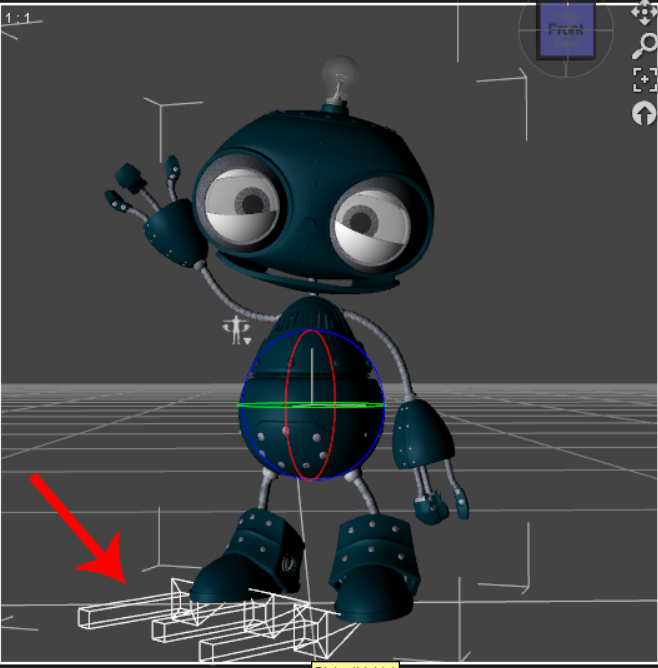
Make sure you adjust the angle of the light well as in the example image below
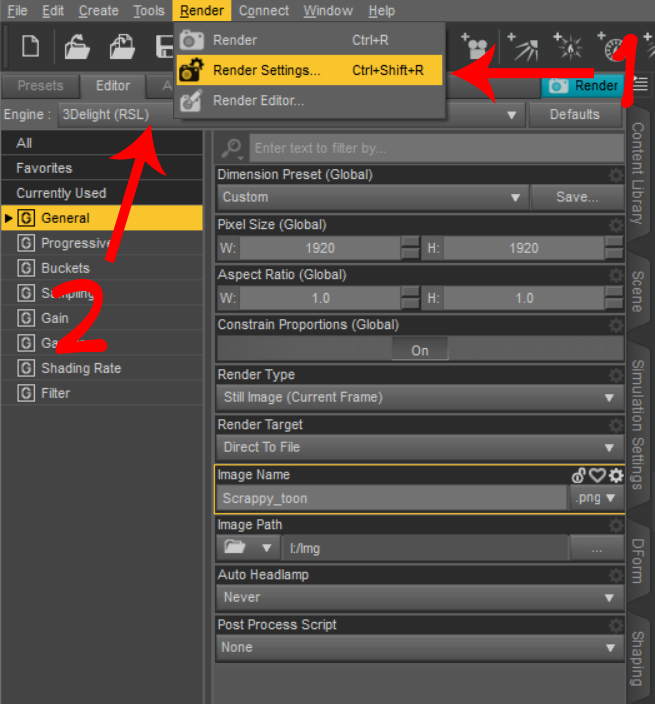
2 Step: Rendering Settings.
Open the menu Render -> Render Settings.
Select the engine to: 3Delight (RSL).
Adjust the image size. In my case I set values of 1920 x 1920 px.
Enter the name of the image and select the .png format. Select the image path and finally click on "Render"


Leave a Comment