


Two quick guides to add automatic translation to Oobabooga: one with Google Translate (via deep-translator), the other with LibreTranslate running locally via Docker. Simple, fast, and to the point.
Introduction: the language dilemma in local LLMs
Oobabooga is a powerful tool. It lets you chat, write stories, or dive into interactive RPG sessions with LLMs (Large Language Models) entirely locally, on your own computer.
And the best part? No built-in ethical filters, no censors, no AI refusing to answer because "that topic is restricted".
In short: Oobabooga lets you chat freely with an uncensored machine, a surprisingly capable companion.
But... there's a problem. A language problem.
Most advanced LLM models — the ones that actually think, imagine, and converse well — have been trained in English. It's their native language, their primary domain, the foundation for fluency, coherence, and rich expression.
While many models today support multiple languages, they often struggle with non-English inputs.
If you try to interact in a different language, you might encounter:
- gibberish replies
- broken immersion in creative sessions
- unnatural or shallow answers
Meanwhile, in English… everything works like magic.
Dialogs feel coherent, characters are more convincing, and replies are deeper and more expressive.
But not everyone is fluent in English — or confident enough to engage in long conversations.
That’s where synchronized translation comes into play.
Imagine writing in your preferred language, and receiving fluent replies in the same — even if the LLM works in English under the hood.
You type → the system translates → the model replies → the reply gets translated back for you.
All in real time. Invisible. Seamless.
This guide shows you two ways to enable this in Oobabooga:
- Using Google Translate with the deep-translator module
- Or running LibreTranslate as a fully offline translation server via Docker
Important Note on Translation & Response Quality
The naturalness, fluency, and coherence of responses depend not just on the language, but also on the LLM model you're using.
For example, a 9B parameter model (like Mistral, Nous Hermes, or Mixtral) will perform much better in multilingual conversations than a 6B or 7B model, which may produce simpler or more repetitive outputs.
The bigger and more optimized the model, the better your experience — especially when working outside English, thanks to real-time translation.
Tip: experiment with different models to find the best balance between performance and multilingual compatibility.
Part 1 – Translation via Google: using deep-translator in Oobabooga
Requirements:
- Oobabooga installed (e.g., in C:\ChatGTP\oobabooga_w10)
- Conda included in your setup
- Internet connection
Steps:
- Open the terminal (cmd)
- Press Win + R, type cmd, hit Enter
- Navigate to the Oobabooga folder
- cd C:\ChatGTP\oobabooga_w10
- Activate the Conda environment
- call installer_files\conda\condabin\conda.bat activate installer_files\env
- Install the deep-translator module
- pip install deep-translator
- Verify the installation
- pip show deep-translator
What is deep-translator?
deep-translator is a Python library that allows you to use multiple translation engines (like Google Translate, Microsoft, Yandex, LibreTranslate, etc.) in your scripts or tools like Oobabooga.
In this case, we’re using Google Translate.
How to Enable It in Oobabooga (for Google Translate)
After installing deep-translator, do the following:
- Restart Oobabooga if it was running
- Open the web interface and go to the “Session” tab
- In the list of available checkboxes, enable google_translate
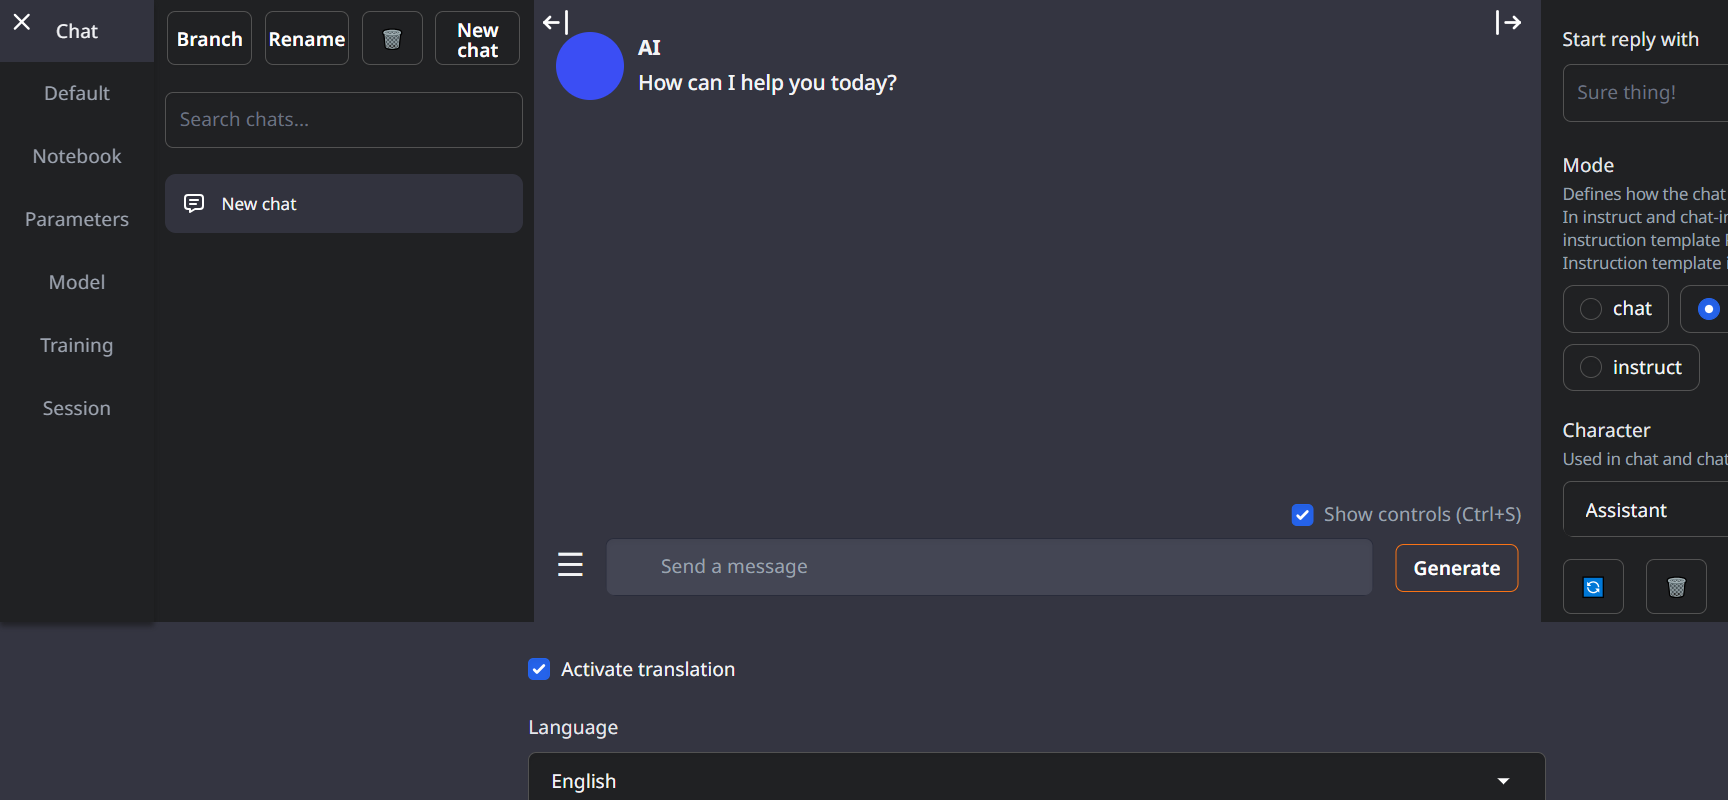
- Return to the “Chat” tab
- Scroll to the bottom of the page — if setup was successful, you’ll see a language selector bar for automatic translation
You’re now ready to chat in any language with real-time translation!
After restarting OObabooga go to the Session tab
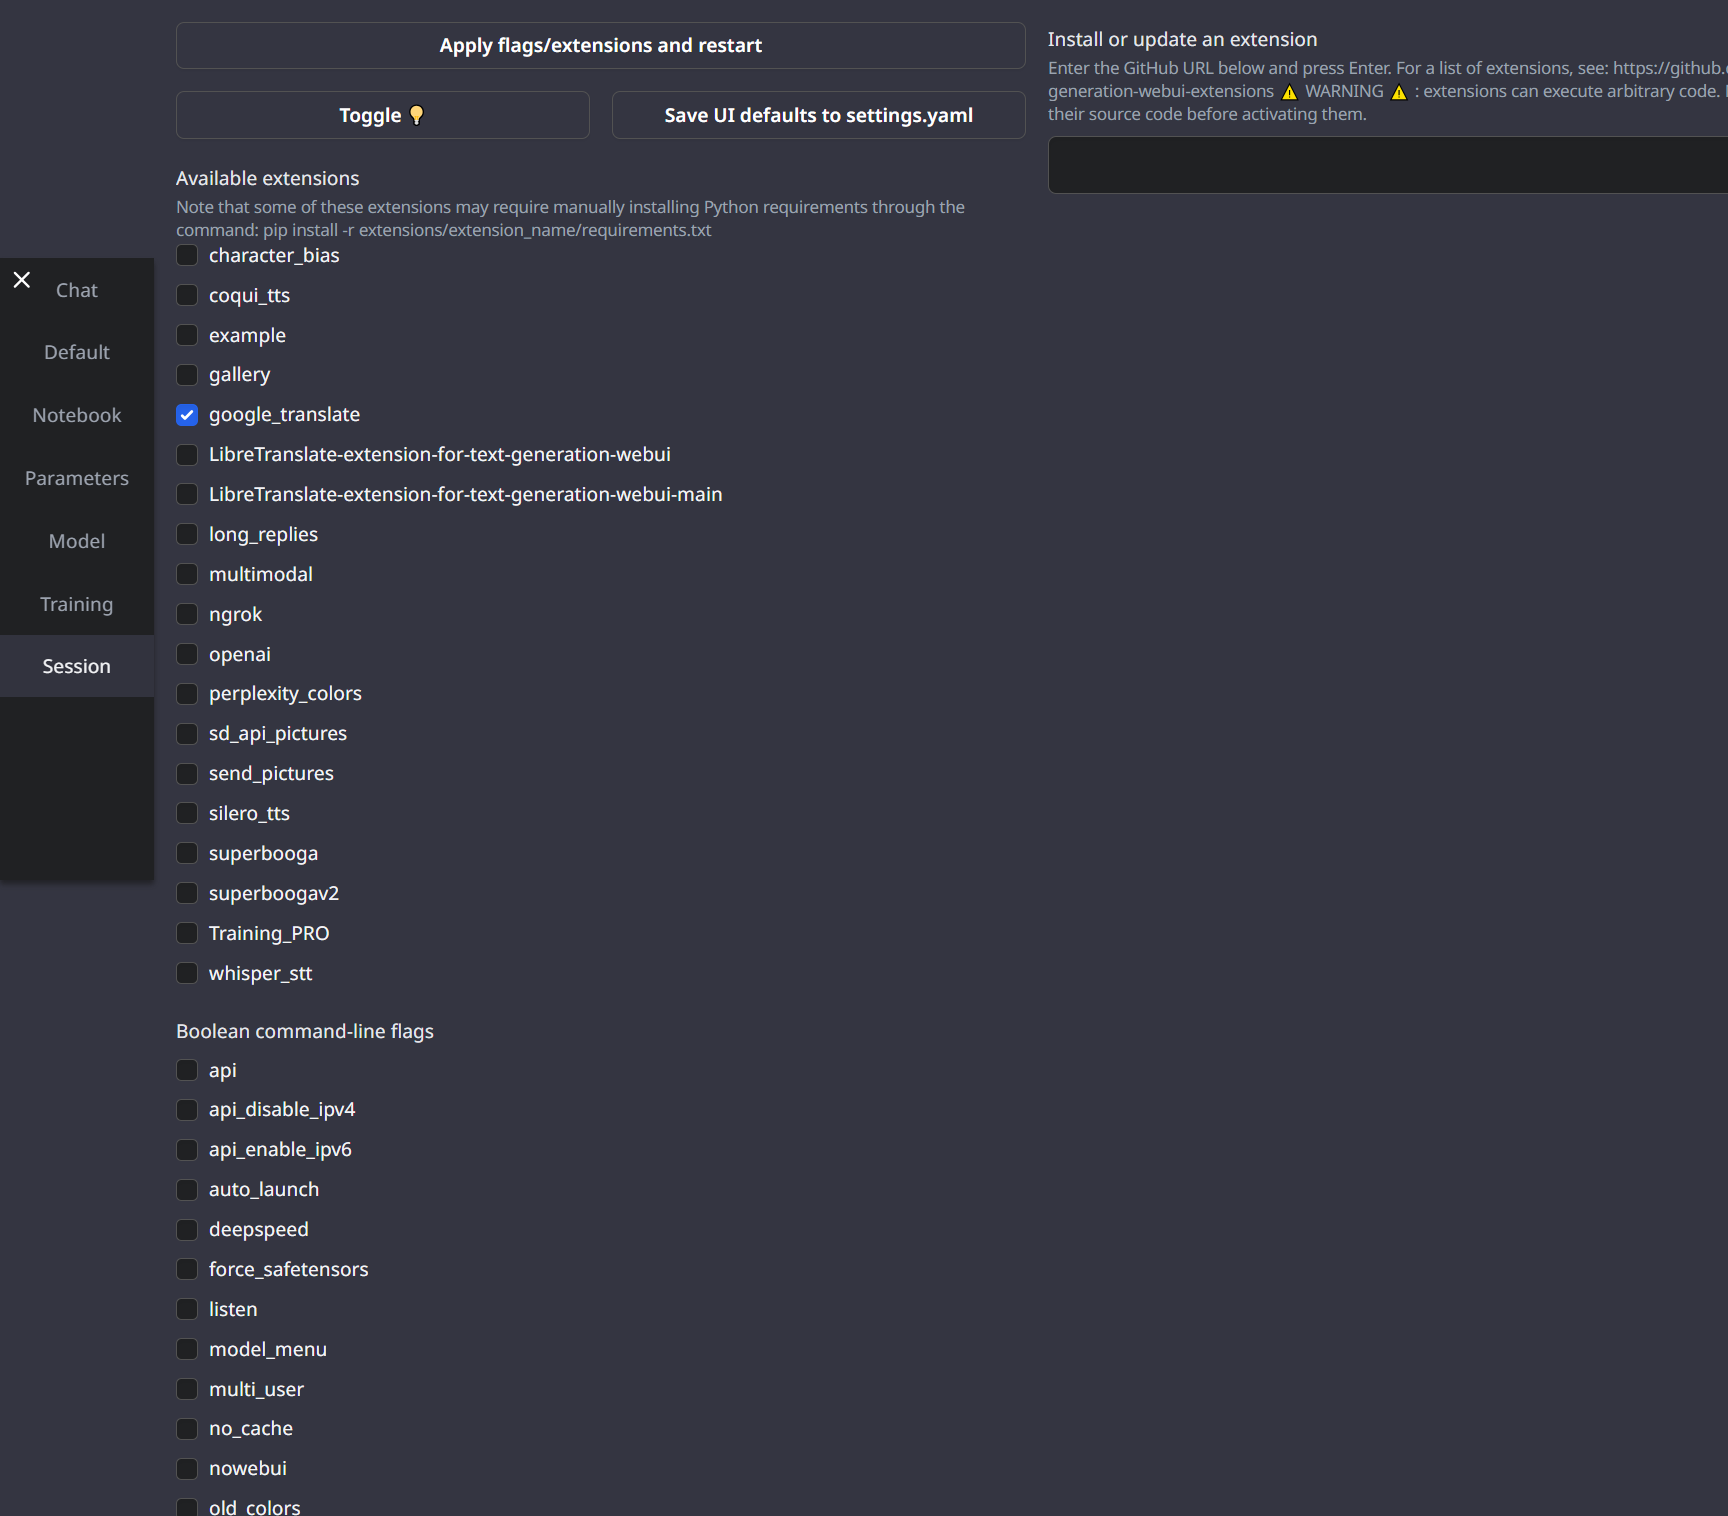
In the list of available checkboxes, enable google_translate or Libretranslate (depending on what you want to enable)
Part 2 – Offline Translation with libretranslatepy + Docker
Want a completely offline solution? LibreTranslate + Docker is for you.
Requirements:
- Docker Desktop installed (Windows)
- Oobabooga and Conda already set up
- At least 1 GB of free RAM
Steps:
- Run the local LibreTranslate server via Docker
- docker run -d -p 5000:5000 libretranslate/libretranslate
- This pulls and starts the server. It will be accessible at http://localhost:5000.
- Navigate to the Oobabooga folder
- cd C:\ChatGTP\oobabooga_w10
- Activate the Conda environment
- call installer_files\conda\condabin\conda.bat activate installer_files\env
- Install libretranslatepy
- pip install libretranslatepy --upgrade
- Verify the installation
- pip show libretranslatepy
How to Enable It in Oobabooga (for LibreTranslate)
Once you’ve started the Docker server and installed libretranslatepy:
- Restart Oobabooga (if running)
- Go to the “Session” tab
- Check the box named LibreTranslate
- Return to the “Chat” tab
- Scroll down — you should now see a language selector bar for real-time translation
All this works without internet — translation is done entirely offline.
Which Method Suits You Best?
| Method | Pros | Cons |
|---|---|---|
| deep-translator (Google) | Easy, plug & play, multi-language | Requires internet connection |
| libretranslatepy + Docker | Works offline, open-source | Requires Docker Desktop |
Both integrate seamlessly into Oobabooga, with toggle options directly in the UI.
Choose the one that best fits your workflow!


Leave a Comment